:max_bytes(150000):strip_icc():format(jpeg)/Simply-Recipes-Foolproof-Dutch-Baby-5-27ed18b16f2440bfa0bba1421709042f.jpg)
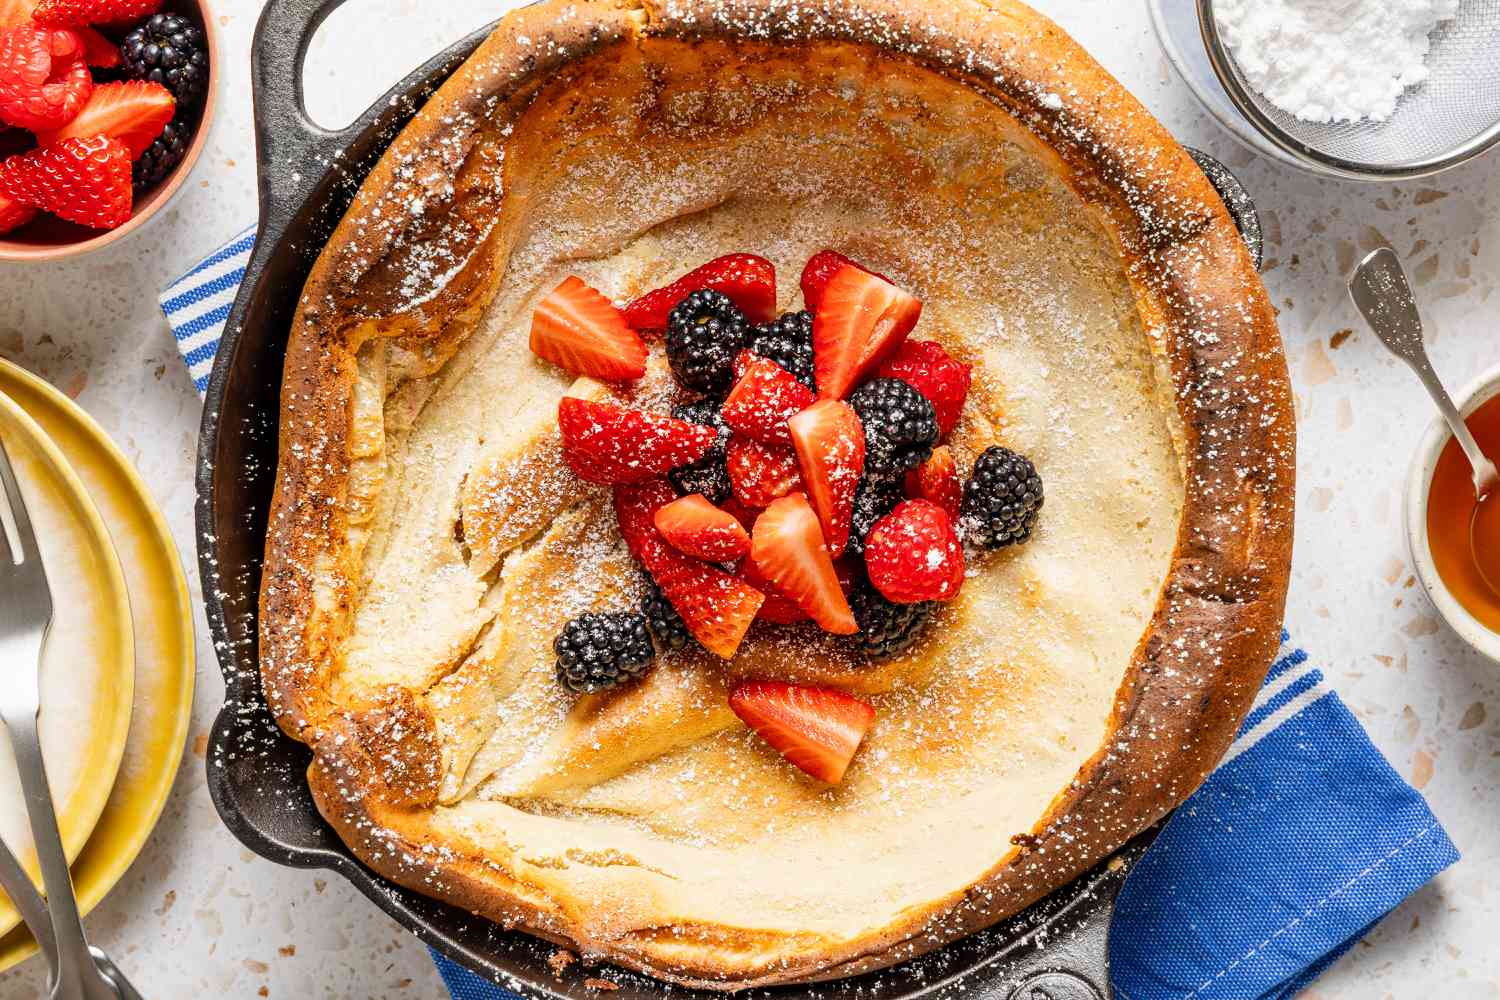
If you love the taste and texture of crêpes but don’t love the tedious task of painstakingly cooking them one by one, allow me to introduce you to their friend the Dutch baby—ironically, born in the Pacific Northwest. It’s a single giant, shareable, puffy, eggy pancake with a cup-like shape that just begs to be filled with toppings.
You may be asking yourself, “Why would something that came out of Seattle be called a Dutch baby?” The exact origins of this dish are up for debate, but in one version of the story, a Seattle diner put a German pancake on the menu, and the daughter of the diner owner mixed up the word “Deutsch” (or German) with “Dutch,” and the rest was history. Given the pancake’s frilly, plump edges, I can’t help but think of adorable little Dutch babies when I make them, so I think the name fits!
The reason I love this style of pancake so much is how fast it is. I throw everything in a blender to ensure the batter is well-mixed and aerated, then pour it into a scorching hot pan all at once. The combination of the egg-heavy batter and a hot oven allows the pancake to rise and set rapidly, which leads to a beautifully fluffy interior with crisp edges.
Simply Recipes / Mark Beahm
Tips for Making Your Dutch Babies Foolproof
When I first started making Dutch babies, I was a little intimidated. Mine never seemed to be quite as dramatic as the perfectly risen examples I saw on the pages of cookbooks or in the early days of Instagram (when people still posted photos!). I learned a few tips and tricks over the years to ensure a foolproof result every time:
- Go room temp. First and foremost, you want your ingredients at room temperature. The majority of the lift comes from the batter rapidly setting as soon as it hits the pan. If you use cold eggs and milk, the batter will need longer to set, resulting in a less-than-impressive final rise.
- Thoroughly preheat your pan. I like to use a cast-iron skillet for this recipe. Once the oven has preheated, I set my pan inside and allow it to heat for at least 10 minutes before adding the batter.
- Blend the batter. It may seem wrong to work flour in a blender and expect a light and fluffy pancake, but the blender ensures lots of air is worked into the batter, which helps the pancake to puff up once it’s in the oven.
Dutch Babies Are for the Whole Family
Maybe I’ve been inspired by the name, but these have always been the first pancakes I’ve given my babies when they are ready to start solid foods. My go-to traditional pancake recipe uses a lot of baking powder, which is totally fine for anyone without dietary restrictions, but makes them quite high in sodium. Since eggs are the only leavener needed in a Dutch baby, it’s the perfect way to introduce little ones to the world of brunch classics!
For the more grown-up eaters at the table, we like to top ours with fresh berries, pure maple syrup, and a little powdered sugar, but the options are endless. Embrace your inner Rembrandt (see what I did there?) and let the crisp-yet-pillowy Dutch baby be your canvas.
Simply Recipes / Mark Beahm
A Dutch baby is a perfect blank canvas for toppings of your choice. Try it with fresh berries, a drizzle of maple syrup or honey, a dusting of powdered sugar, slathered with jam or lemon curd, or your choice of toppings.
Cook Mode
(Keep screen awake)
-
3 tablespoons unsalted butter, divided
-
3/4 cup milk, room temperature
-
3/4 cup (90g) all-purpose flour
-
3 large eggs, room temperature
-
3 tablespoons granulated sugar
-
1 teaspoon vanilla extract
-
1/4 teaspoon ground cinnamon
-
1 pinch kosher salt
-
1 pinch ground nutmeg, optional
-
Preheat the oven to 400°F.
-
Preheat the pan:
When the oven reaches temperature, place 1 tablespoon of butter in a 10-inch cast iron skillet. Set the skillet in the oven to preheat for 10 minutes.
-
Melt the remaining butter:
While the skillet is preheating, place the remaining 2 tablespoons of butter in a microwave-safe bowl and heat in the microwave until fully melted, about 30 seconds. Let cool slightly.
-
Make the batter:
When there are about 5 minutes remaining in the preheating time, start the batter. In the jar of a high-speed blender, combine the milk, flour, eggs, sugar, melted butter, vanilla, cinnamon, salt, and nutmeg, if using. Blend at medium speed until smooth and filled with tiny air bubbles, 1 to 2 minutes.
-
Bake:
Carefully pull out the oven rack so you can easily pour the batter into the middle of the pan. Immediately after pouring, push the rack back in and close the oven. Bake until the center is puffy and the edges are crisp, 20 to 25 minutes. Serve warm, straight from the pan, adorned with your toppings of choice.
Leftovers can be cut into slices and stored in an airtight container in the refrigerator for up to 3 days. Reheat on a baking sheet in a 350°F oven until crisp and heated through, about 5 minutes.
Love the recipe? Leave us stars and a review below!
| Nutrition Facts (per serving) | |
|---|---|
| 183 | Calories |
| 9g | Fat |
| 20g | Carbs |
| 6g | Protein |
×
| Nutrition Facts | |
|---|---|
| Servings: 4 to 6 |
|
| Amount per serving | |
| Calories | 183 |
| % Daily Value* | |
| 9g | 11% |
| Saturated Fat 5g | 24% |
| 111mg | 37% |
| 64mg | 3% |
| 20g | 7% |
| Dietary Fiber 0g | 2% |
| Total Sugars 8g | |
| 6g | |
| Vitamin C 0mg | 0% |
| Calcium 56mg | 4% |
| Iron 1mg | 6% |
| Potassium 97mg | 2% |
| *The % Daily Value (DV) tells you how much a nutrient in a food serving contributes to a daily diet. 2,000 calories a day is used for general nutrition advice. | |
Nutrition information is calculated using an ingredient database and should be considered an estimate. In cases where multiple ingredient alternatives are given, the first listed is calculated for nutrition. Garnishes and optional ingredients are not included.

Leave a Reply