:max_bytes(150000):strip_icc():format(jpeg)/simply-recipes-biscoff-ice-cream-cake-lead-7-539384e3e1e6489481bfca980dfd1cfe.jpg)
I was first introduced to the concept of an icebox cake via Ina Garten’s mocha chocolate version. At the time, I was living in an NYC apartment that more closely resembled a closet. It was hot as anything in the summer (and the winter, too, thanks to the steam heat), so baking was very much not an option.
With this icebox cake, I couldn’t believe the sorcery I created by simply layering together store-bought cookies and jazzed-up whipped cream. The resulting cake felt like something you might get at a fancy restaurant, not something that took all of 10 minutes to throw together.
I’ve been experimenting with different flavors and textures for icebox cakes ever since. After a recent trip to Costco, where I stocked up on more Biscoff cookies than Delta Airlines, I decided it was time to whip up a spiced-cookie version of this easy summer treat.
I love crumbling Biscoff cookies on top of ice cream sundaes, so I really wanted to find a way to incorporate ice cream into the cake itself. It’s an icebox cake, so of course there had to be whipped cream, too.
After a few messy yet delicious failures, I’ve perfected a super-easy 4-ingredient Biscoff icebox cake that is perfect for summer entertaining. You can fully assemble the cake several days in advance, then let it thaw slightly before unmolding and serving.
Simply Recipes / Frank Tiu
Tips for Making This Icebox Cake
- I especially love the combination of the toasty Biscoff biscuits with dark chocolate ice cream, but any variety of ice cream you enjoy will work here. Caramel, toffee, and coffee are just a few options that come to mind when I think of the buttery, caramelized notes found in a Biscoff cookie.
- Before you start in on this recipe, make sure you clear a space in the freezer where the loaf pan can easily fit and sit level.
- The key is to let the ice cream sit in the fridge for about 30 minutes before you assemble the cake. You want it soft enough that you can spread it into an even layer, but not so soft that it becomes soup.
- Unmolding the cake requires some patience—make sure you add a double layer of plastic wrap to the loaf pan so you have something to help you guide the finished cake out of the pan after freezing. Also, it helps if you let the entire cake sit in a tray of hot water for just a few minutes before inverting the cake onto a serving platter.
Simply Recipes / Frank Tiu
More Recipes for When It’s Too Hot To Cook
Cook Mode
(Keep screen awake)
-
1 (14-ounce) container ice cream, any flavor (I love Häagen-Dazs chocolate)
-
2 cups heavy cream
-
1/4 cup granulated sugar
-
1/2 teaspoon vanilla bean paste or vanilla extract, optional
-
1 (8.8-ounce) package Lotus Biscoff Cookies
-
Soften the ice cream:
Set the ice cream on the counter to soften for about 25 minutes. After about 10 minutes, you can start prepping the rest of the cake. The ice cream should be spreadable but not yet melty.
-
Prepare the pan:
Line a 9×5-inch loaf pan with plastic wrap using four sheets total: you want two sheets overlapped across the long end of the pan, and two overlapped across the short end. This will provide you with a sling to grasp onto when it is time to unmold the cake.
-
Make the whipped cream:
In the bowl of a stand mixer fitted with the whisk attachment, whip the cream, sugar, and vanilla, if using, on medium speed until you reach medium peaks, 3 to 4 minutes.
-
Layer:
Add about 1 cup of the whipped cream to the bottom of the prepared pan and spread it into an even layer with an offset spatula. Add a layer of cookies, breaking the cookies as needed to accommodate the shape of your pan. You’ll use roughly 8 cookies, and you want a nice even layer.
Use an ice cream scoop to add about half of the ice cream on top of the first layer of cookies. Try your best to evenly distribute the ice cream in scoops on top of the cookies to make smoothing it into an even layer easier. Use an offset spatula to spread the ice cream into an even layer.
-
Repeat the layers:
Add a second layer of cookies, spread about 1 cup of the whipped cream on top and smooth into an even layer. Add a third layer of cookies. Add the final layer of ice cream, repeating the same scooping process and smoothing into an even layer. Top the ice cream with the fourth and final layer of cookies.
Add about 1 cup of the remaining whipped cream on top of the final layer of cookies. You may not need to use all of the whipped cream depending on the shape of your loaf pan. Just ensure that you have a final thick and even layer of whipped cream at the very top of the pan.
-
Freeze:
Tightly wrap the cake with the excess plastic wrap and place the pan in the freezer for at least 6 hours and up to 3 days.
When ready to serve, fill a shallow pan with hot water and set the loaf pan inside. Let defrost for about 5 minutes, then dry the bottom of the pan thoroughly and unwrap the plastic wrap. Use a butter knife to loosen the edges, then invert the pan onto a serving platter. Remove and discard the plastic wrap.
-
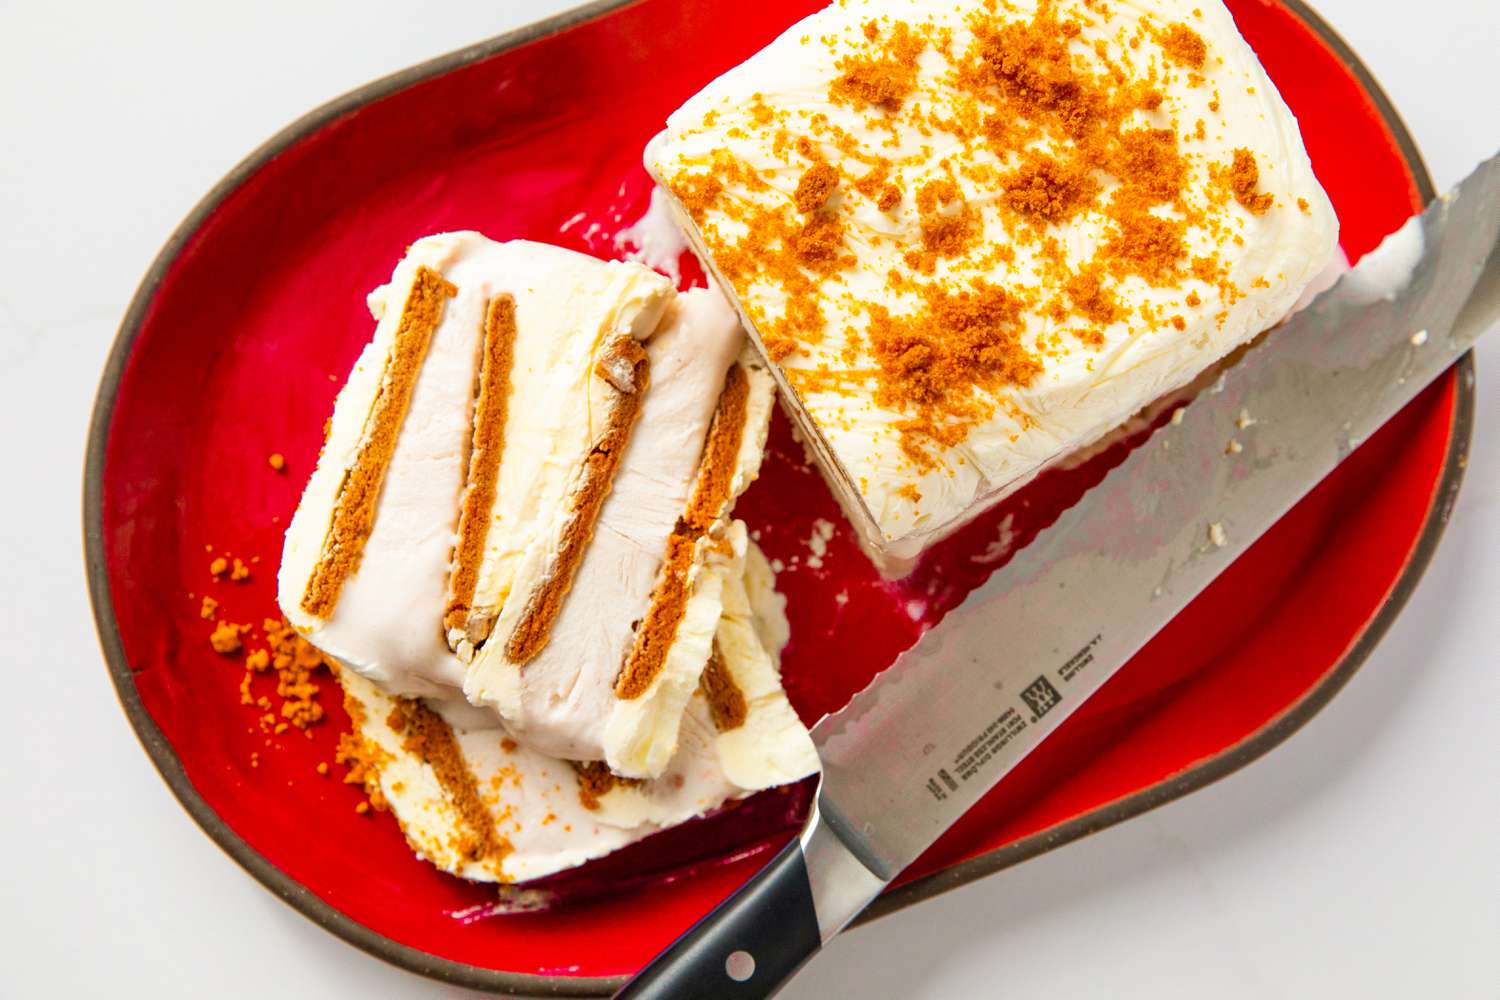
Slice and serve:
Using a sharp chef’s knife warmed under hot water, slice the cake into 1-inch slices and serve immediately.
Leftover cake can be stored on the serving platter tightly wrapped for up to 1 month in the freezer.
Love the recipe? Leave us stars and a comment below!
| Nutrition Facts (per serving) | |
|---|---|
| 386 | Calories |
| 28g | Fat |
| 32g | Carbs |
| 4g | Protein |
×
| Nutrition Facts | |
|---|---|
| Servings: 6 to 10 |
|
| Amount per serving | |
| Calories | 386 |
| % Daily Value* | |
| 28g | 36% |
| Saturated Fat 16g | 78% |
| 71mg | 24% |
| 122mg | 5% |
| 32g | 12% |
| Dietary Fiber 1g | 3% |
| Total Sugars 23g | |
| 4g | |
| Vitamin C 1mg | 3% |
| Calcium 88mg | 7% |
| Iron 1mg | 8% |
| Potassium 167mg | 4% |
| *The % Daily Value (DV) tells you how much a nutrient in a food serving contributes to a daily diet. 2,000 calories a day is used for general nutrition advice. | |
Nutrition information is calculated using an ingredient database and should be considered an estimate. In cases where multiple ingredient alternatives are given, the first listed is calculated for nutrition. Garnishes and optional ingredients are not included.


Leave a Reply